

Every swimmer knows that a great race begins with a strong start.
But how can you ensure that your swimming starts are consistently propelling you onto the podium?
In this article, I dive into the mechanics and science behind a strong swimming start, providing you with actionable advice that you can apply to fine-tune your starts and leave your competition scrambling to catch up.
What Is the Start in Swimming?
The start encompasses a few things:
- The dive
- The underwater
- The breakout
Setting Up the Perfect Swimming Start: Dive Technique
In this section, I teach you how to dive with perfect technique.

Deciding on a Front or Rear Weighted Stance
Before we get started, I want to discuss the two stances you can use when setting up your dive, namely the front- or rear-weighted stance.
If it wasn’t clear already, a front-weighted stance means you place more weight on your front foot, while a rear-weighted stance means you have more weight on your back foot.
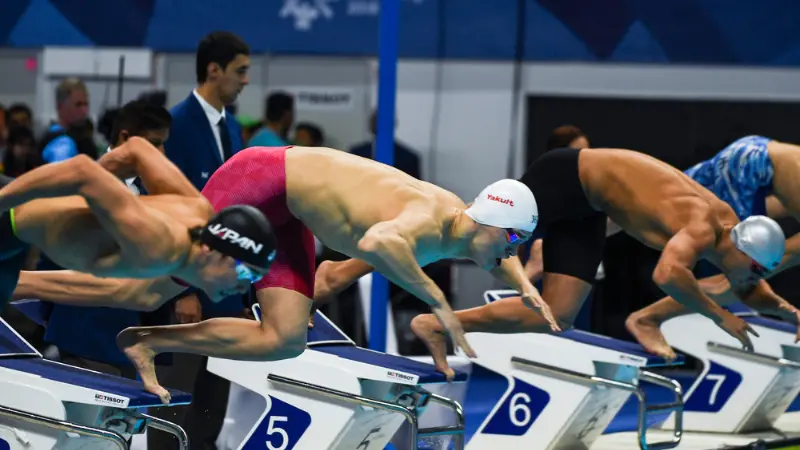
Both of these stances have advantages and disadvantages. Front-weighted starts allow for a faster reaction time off the block. In contrast, rear-weighted starts have a slower reaction time but allow for more rapid acceleration away from the block.
A front-weighted stance can be advantageous for swimmers with exceptionally good underwaters, as a faster reaction time will allow you to start your dolphin kicks earlier.
However, it’s unclear whether one stance is better than the other.
One study published in the Journal of Sports Biomechanics concluded that a rear-weighted track start was more advantageous overall than a front-weighted start.
In contrast, another study published in the same journal found that the front-weighted start produced more distance than the back-weighted start but that there were no other significant differences. The study concluded that swimmers could use either of the starts depending on the type of swimming competition.
Lastly, yet another study found significant differences in what is considered an optimal center of pressure (aka front- or rear-weighted starts) between individual swimmers.
Considering all of this, a good guideline is to find a position on the block where you both feel comfortable and can perform a strong start– regardless of whether it is front-weighted, back-weighted, or a combination of the two.
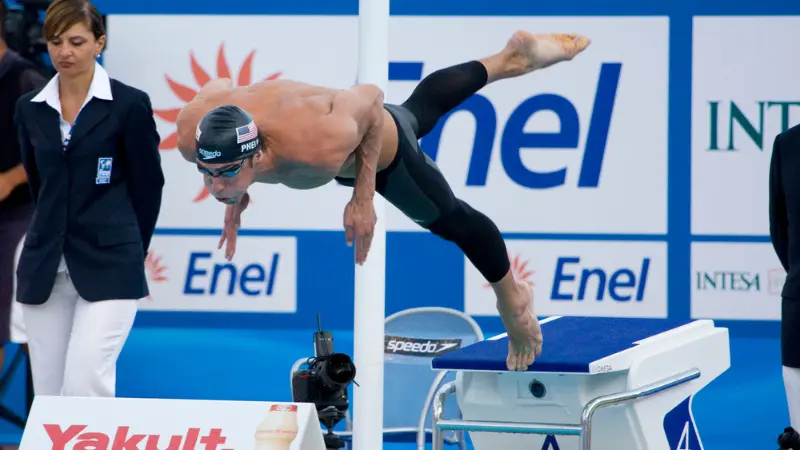
That said, Caeleb Dressel, who is widely considered to have the best start in the world, uses a front-weighted start.
Here is a quick video where you can see how Dressel destroys his competition with his excellent start.
The Anatomy of a Deadly Dive
Now that we discussed the difference between the front- and rear-weighted stance, let’s set it up correctly.
Positioning Your Feet and Toes to Face Directly Forward on the Starting Block
The first aspect of setting up your dive is correctly positioning your feet and toes on the starting block.
Once you are on the starting block, make sure that both of your feet are facing directly forward. Many swimmers position themselves so that their feet are slightly skewed, resulting in lost forward propulsion when diving.
Your feet should be positioned slightly narrower than shoulder-width apart.
You can choose whether to place your dominant leg at the front or the back of the block. I prefer to have my dominant leg at the front of the block, but many other swimmers choose to have it at the back.
At the end of the day, you must find what’s comfortable and works best for you.
For your front foot, wrap your toes around the front of the block. This will ensure a proper grip on the block and generate maximum forward power from your front leg when pushing off the block.
Position your back foot on the wedge so that the ball of your foot makes contact with the block. You also want to keep your back foot relatively high up on the wedge. This will allow your calf muscle to contribute some force when jumping while making it easier to throw your back leg up. (We’ll discuss this in more detail later).
If your starting block doesn’t have a wedge, find a comfortable position for your back foot where you can still generate power.
Gripping the Block
When holding onto the block, keep your wrists in a neutral position and grab the block, wrapping all of your fingers around the front of it– this includes your thumb.
Having your thumb around the edge of the block allows for slightly extra forward power from your arms.
Many swimmers will keep their thumbs on the block for extra stability. This is incorrect.
Hip Position
Regardless of whether you prefer a front- or rear-weighted stance, your hips should always be above your shoulders.
This will prevent you from leaning back. Many swimmers tend to make the common mistake of leaning back too far on the block, almost like they want to slingshot themselves away.
This is incorrect and will make your start slower.
Remember, you want to be able to move forward as fast as possible. Leaning back means you’ll have to cover more distance before being able to start moving forward when the buzzer goes off. Whereas if you aren’t leaning back, you can start moving forward right away.
For a front-weighted stance, your hips will be higher above your shoulders compared to a rear-weighted stance.
This is because you are leaning slightly more forward to place most of your weight on your front foot.
With a rear-weighted start, you want to lean slightly backward (generally, a few degrees is enough) to position most of your weight on your back foot. Remember, you don’t want to lean too far back since it’ll increase the distance you have to travel, ultimately slowing you down.
Leg Position and Angle
Your leg position will also be slightly different depending on whether you use a front- or rear-weighted stance.
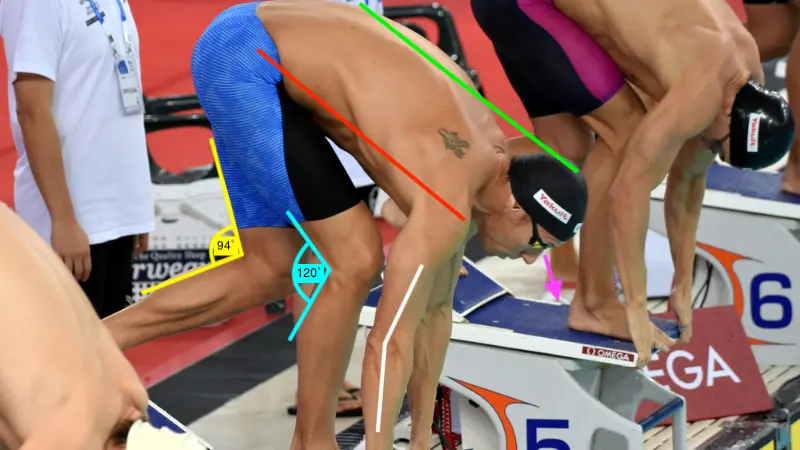
For a front-weighted stance, your front leg should have less of a bend. A good bending angle is 120-130˚for your front leg.
Your back leg should have a sharper bend angled at about 90˚ as this is ideal for generating the most power.
These angles will be slightly different on a back-weighted stance. But as mentioned, it only takes a few degrees to shift most of your weight to the back foot.
Shoulder, Arm, and Elbow Position
Once again, your shoulder position will depend on whether you prefer a front- or back-weighted stance, as discussed earlier.
A back-weighted stance will result in your shoulders being in line or slightly behind the edge of the block. In contrast, a front-weighted stance will place your shoulders slightly in front of the edge of the block.
As mentioned earlier, the front-weighted stance results in a faster reaction time. This is partially due to your shoulders being positioned in front of the block since this allows you to move forward faster than the back-weighted stance.
Holding onto the block, you want your arms tucked in towards your body. Some swimmers may choose to keep their arms fully extended. Still, generally, I recommend having a slight bend in the elbow and tucking them towards your body.
You want to avoid having your elbows flare out to the sides since this will increase your reaction time and make you dive slower.
If your elbows are tucked, you can immediately start moving forward. In contrast, if they flare out, you’ll first have to bring them in before you can begin the forward movement, which ultimately slows you down.
Back Position
Throughout all of this, you also want to ensure a neutral back position. Your back doesn’t have to be completely straight, but it shouldn’t be hunched.
A good cue to think about here is to pull the slack out of the block. This will tighten your back, allowing you to explode off the blocks.
You can also think about pushing your chest out.
A straight back ensures more tension in your upper body, allowing you to explode off the blocks with more power.
Head Position
The optimal head position is a slightly controversial topic, with swimmers using various techniques.
It could be argued that head position is not as important of a factor when it comes to the swimming start compared to other aspects that could have a more significant impact on the efficiency of your dive, such as your leg, hip, and shoulder positioning.
Once again, I’m going to recommend that you try different techniques and figure out what works for you. Also, don’t be afraid to change it in the future.
Generally, I recommend a neutral head position where you keep your head tucked by looking down towards your feet to keep your head in line with your spine.
When you explode from the blocks, you want to try to maintain this neutral head position.
The idea is that not lifting your head (or lifting it very minimally since a completely neutral head position is extremely difficult to achieve) will maximize your forward momentum.
On the other hand, some swimmers prefer to look slightly forward toward the water.
When exploding off the blocks, they throw their head up, looking almost straight ahead and tucking it back down into a neutral position as they go into a streamline and enter the water.
The idea here is similar, with swimmers trying to create extra momentum using their heads before entering the water.
How to Perform the Perfect Swimming Start
With your dive correctly set up, it’s time to execute it.
Below I will cover different aspects of executing the start. That said, it’s important to note that even though I’m breaking it down step-by-step, each one of these phases will take place very quickly, in many cases overlapping with each other.
Therefore it’s essential to be patient. It will take a lot of time and practice to master each one of the aspects– and eventually, the entire start.
Make Sure That You’re Tensed on The Diving Block
A quick tip to ensure that you can get off the blocks as fast as possible is to tense and flex your entire body before the buzzer goes off.
Usually, you’ll do this when the starter gives the cue to take your marks.
By ensuring that your muscles are tensed beforehand, you can immediately initiate the start when the buzzer goes off, not wasting any time by first tensing up before exploding from the blocks.
Utilizing Your Arms to Gain Maximum Momentum
When the buzzer goes off, your arms will be the first part of your body to react. Your legs are large muscles and will take slightly longer before starting to drive you from the block.
Many swimmers underutilize the arm motion, losing the opportunity to gain extra drive from the block.
By pulling back on the block when the buzzer goes off, you immediately start pushing your entire body forward.
Remember, you want to start with your elbows already tucked in so that the arms can immediately begin driving you forward.
Once you’ve used your arms to push forward on the block, you can either directly throw them forward or pull them back further and bring them over in a butterfly stroke-like motion.
Throwing your arms directly forward allows you to enter the streamlined position faster.
On the other hand, bringing them over like a fly-stroke allows you to gain much more momentum before entering the water, resulting in a more powerful start.
Once again, you need to find what works best for you. Just because the fly-stroke motion allows for a more powerful start doesn’t mean that it’ll necessarily be better for you.
Sometimes the simpler approach of throwing your arms directly forward is superior.
Related: Best arm exercises for swimmers
Do You Want to Make Every Lap Count?
Stop wasting your time in the pool feeling lost and doing directionless swim workouts, and start training effectively! Our ebook contains 97 structured and goal-orientated swim workouts to help you become a better, faster, and fitter swimmer. Whether you’re a complete beginner or a seasoned pro, there are a multitude of workouts for every type of swimmer.
Driving with Your Legs and Utilizing the Back Leg for Extra Momentum
Directly after pulling back on the block with your arms, the legs will start driving forward. You will gain the majority of your power in your start from your legs.
Extend your legs as powerfully as possible to drive forward and explode off the block.
During this phase, your front leg will generate most of the forward propulsion, regardless of whether you use a front- or back-weighted stance.
The difference is that the back-weighted stance will allow for more sources of propulsion, namely from:
- Your back foot
- Whereafter your weight shifts to your front foot
- And it also allows for a bit more tension in your arms
In the front-weighted stance, the front leg will drive most of the propulsion.
As you drive forward and your back leg leaves the wedge, throw it up into the air. This will allow you to gain extra momentum as you enter the water.
You want to make sure to bring your front leg in line with your back leg before entering the water so that your body is in a straight line.
Once again, this is a more advanced technique that will take time to master.
Related: Best leg exercises for swimmers
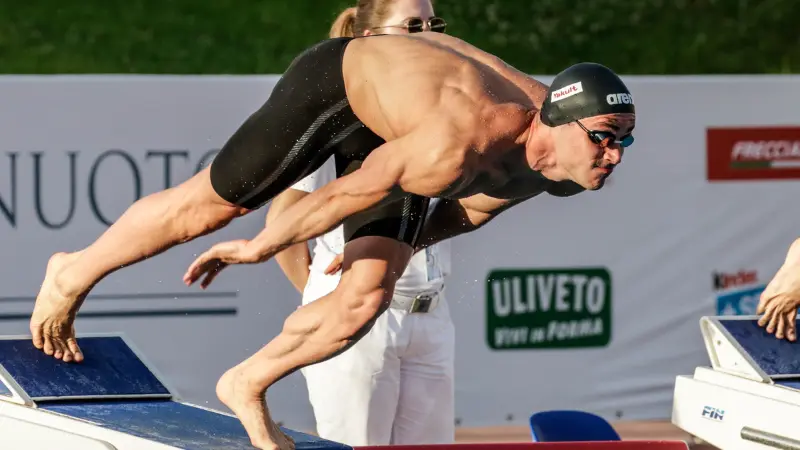
The Entry
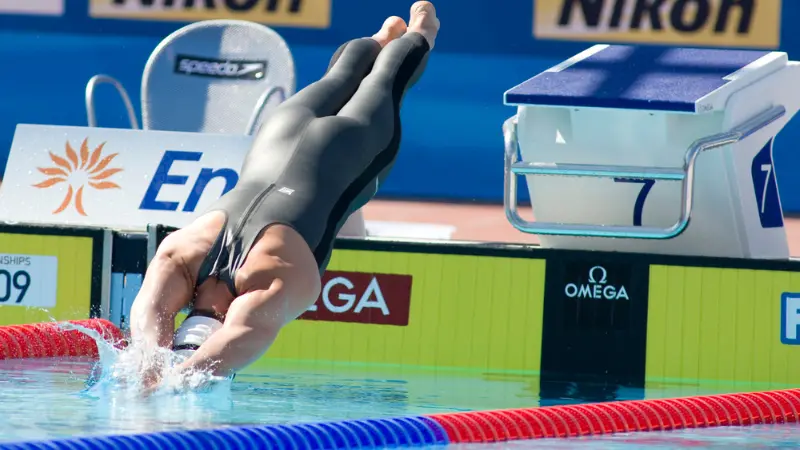
The entry can be regarded as perhaps the most crucial aspect of your entire dive.
No matter how much power and momentum you can generate in the initial stages of your dive, if you don’t have a clean entry, you’ll lose the majority of that speed, making it of little use.
The goal is for your entire body to enter through one hole.
An easy way to know if you have a clean entry is if there is little splash when you enter the water.
Streamline
Before entering the water, you want to bring your arms over and make sure that your body is in a streamlined position. This will occur as you are flying through the air.
A good streamline includes:
- Tucking your chin
- Placing your arms behind your head or next to your ears
- And wrapping your hands together so that one wrist is positioned over the other
- There should be no gaps between your head and your arms
Point Your Toes
An aspect that most swimmers (even at the elite level) often overlook is pointing their toes on entry.
According to propulsion tests by The Race Club, not pointing your toes can result in 41% more frontal drag than having your toes pointed.
A slight bend in the knee can further help ensure that your legs enter cleanly with minimal splash.
Pike Your Hips Mid-Air
When entering the water, you don’t want to be in a completely straight line.
If you enter the water completely straight, it will cause your body to bend slightly up when you hit the water, creating what many coaches refer to as a banana shape. This bend causes your hamstrings and calves to lift, resulting in extra drag.
On the other hand, you don’t want to pike too much, either. Too much of a pike will make it impossible for your entire body to enter through one hole. This means your legs will slap the water, causing a splash and extra drag on entry.
Ideally, you want your hip pike to be almost precisely 30˚. This way, when your upper body hits the water, it will straighten you out, resulting in a perfectly clean entry.
An important point to note here is that you want to experiment with where you enter the water. If you try to gain too much distance from the blocks, it will result in a flatter entry, ultimately resulting in more drag.
On the other hand, entering slightly closer will allow for a better hip pike and entry, which is ultimately more advantageous since you’ll be carrying more of the speed from the dive into the water.
Underwaters
After entering the water, it’s time for the underwater phase.
On entry, you want a slight delay before starting your dolphin kicks. This will allow you to carry your peak propulsion for a few extra split seconds.
When you start dolphin kicking, it will inevitably create extra drag since your legs will be exiting your body line.
By holding off just a bit (0.5-0.6 seconds), you can carry your peak propulsion underwater. Right as you start slowing down, you initiate your dolphin kicks.
Ensure you know how many dolphin kicks you must take before breaking out.
You can stay underwater until 15m for butterfly, backstroke, and freestyle. There are no restrictions for breaststroke, but you are only allowed one dolphin kick in your breaststroke pullout.
The Breakout
The final phase of your start is the breakout.
You want to initiate your first stroke as the top of your head breaks the water.
Initiating the breakout too early will result in significant drag. Initiating it too late will cause you to slip in the water and lose a lot of power.
Once you’ve broken the surface of the water, I recommend taking three strokes to set your pace. Once you have your pace set, hold it until the end of the length. If you need to turn, take another three strokes after the turn to set your pace again.
Swimming Start Drills
Hula Hoop Dives
As mentioned, the entry is one of the most crucial aspects of an effective start in swimming.
The hula hoop drill allows you to train a clean entry with minimal splash.
Have someone hold the hula hoop where you’d like to enter. Then practice diving from the blocks through the hula hoop, ensuring that your body doesn’t touch the sides.
This drill also allows you to train the distance you want to gain from your start. If you think you can gain more distance from the start while maintaining a clean entry, move the hula hoop a bit further away.
Pool Noodle Dives
The pool noodle drill is a similar concept compared to the hula hoop drill.
Hold a pool noodle in the water and dive over it.
This drill is good for training the distance you gain off the blocks.
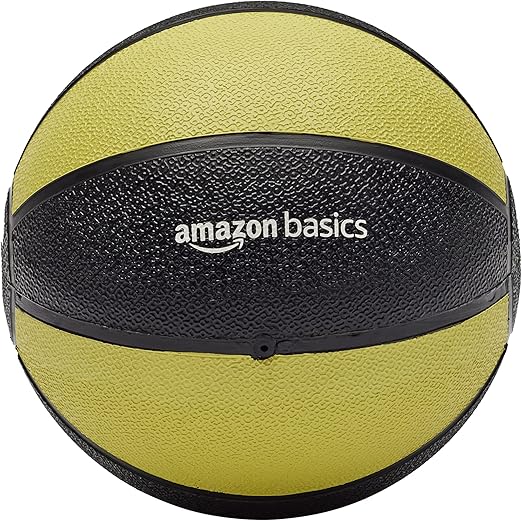
Med Ball Push Drill
This is a dryland drill aimed at teaching you how to push off the starting blocks effectively.
Place 2 medicine balls next to your sides and slightly in front of you. Then go into the starting position. Keep your hands on the medicine balls.
Have someone set you off, then jump forward as you would on the dive, but focus on pushing the medicine balls as far back with your arms as possible. (By having someone set you off, you are also training your reaction time)
Reaction Drills
According to an MIT study, the average reaction time for a track start is 0.71 seconds.
This is in line with findings published on SwimSwam obtained from analyzing the reaction times of hundreds of World Championship swimmers.
Reaction drills will help ensure that you can react as fast as possible when the buzzer goes off, not wasting any time on the blocks.
Here are a few simple drills:
- Place a water bottle or cup between yourself and a teammate. Have someone set you off and see who can grab the bottle first.
- Juggle tennis balls against a wall.
- Throw a ball into the air, let it bounce, and try to catch it with one hand.
- The medicine ball push drill where someone sets you off (discussed earlier)
- Stretch out your arm and drop the ball from shoulder height, trying to catch it with the same hand. You can increase the height until you drop the ball from above your head.
Dryland Exercises for an Explosive Start
Dryland can be another beneficial way to improve your start.
Plyometric Exercises

Plyometric exercises are efficient for improving your vertical jump and power off the blocks.
Here are some excellent plyometric exercises to incorporate into your training:
- Box Jumps
- Skipping
- Jumping Lunges
- Medicine Ball Slams
- Broad Jumps
- Depth Jumps
Check out my article on dryland exercises for swimmers for a complete breakdown of over 150 of my favorite exercises.
Mobility and Flexibility
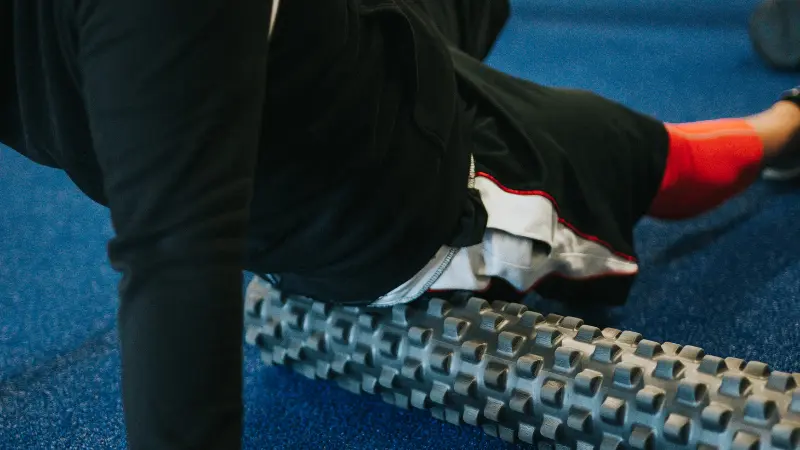
Being flexible is another vital aspect of having a great start.
A good start requires you to manipulate and bend your body on the starting blocks and in the air. This is only possible by having good flexibility.
Key areas to focus on include the feet, ankles, hips, shoulders, and back.
Static stretching is best for improving flexibility, while dynamic stretching is better for warming up.
A study published in the International Journal of Athletic Therapy and Training advises that you perform static stretching in the evening or after workouts to improve your range of motion. It is not recommended to do static stretching before workouts.
Here are some stretches that you can perform:
- Ankle rotations
- Lying glute stretch
- Doorway chest stretch
- Child pose stretch
- Downward facing dog
- Upward facing dog
- Lat stretch
This is by no means a comprehensive list. Feel free to incorporate your own stretches.
Perfect Your Swimming Starts and Leave Your Competitors Trailing In Your Bubbles
Perfecting your swimming start and dive is critical to achieving peak performance in the pool.
By focusing on all of the different aspects discussed in this article and taking the time to practice them consistently, you’ll be able to refine your start technique and gain a competitive edge.
Remember, mastering the start is a complicated process that’ll take a lot of time and patience– but it’s also one with significant benefits for your swimming.